Air fryer chickpeas are the ultimate solution for anyone seeking a crunch that rivals traditional potato chips but with a massive boost of plant-based protein. If you have been searching for the perfect high-protein snack that takes less than 20 minutes, these air fryer chickpeas deliver a shattered, blistered texture that is scientifically superior to oven-roasting. By using rapid air circulation, we transform a humble can of beans into a vibrant, golden-orange masterpiece dusted with smoked paprika and garlic granules. Once you hear the audible crunch of these chickpeas, you will never go back to store-bought snacks again.
Why These Blistered Air Fryer Chickpeas Are a Game Changer
- Shattered Blistered Texture: Unlike oven-baked versions that can turn chewy, these air fryer chickpeas develop a thin, crispy outer shell that literally shatters when you bite into it.
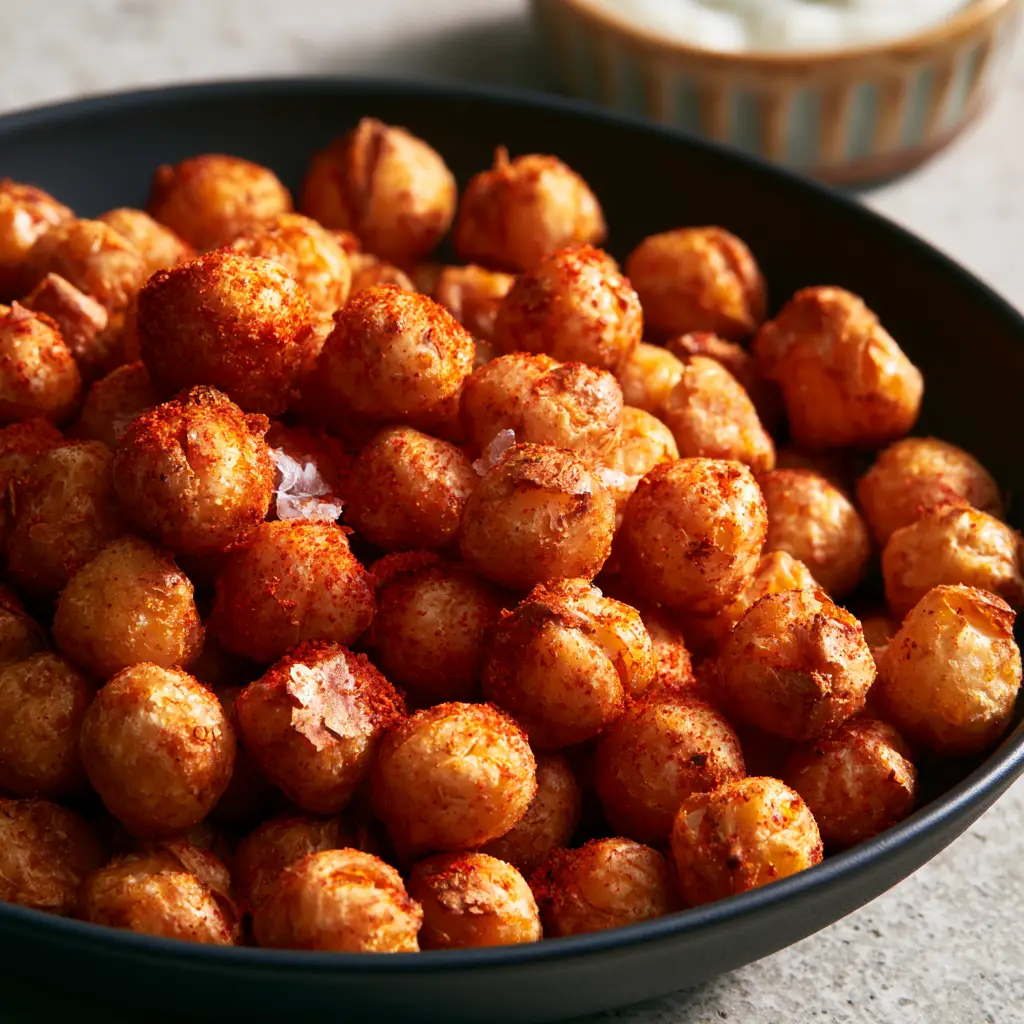
- Vibrant Smoky Flavor: The heavy dusting of vibrant red smoked paprika and fine garlic powder creates a bold, savory profile that pairs perfectly with the creamy tahini dip.
- Hyper-Fast Prep: This recipe transitions from your pantry to a modern matte black serving bowl in under 20 minutes, making it the king of high-protein snacks.
- Visual Masterpiece: With translucent crystals of coarse sea salt and a deeply roasted golden-orange hue, these chickpeas look as good as they taste.
The Anatomy of the Perfect Crunchy Chickpea
To achieve the “visual recipe blueprint” of deep roasting and blistered skins, every ingredient serves a specific culinary purpose. We aren’t just tossing beans in oil; we are engineering a crunch.
1 Can (15 oz / 425g) Chickpeas: Also known as garbanzo beans. Ensure they are thoroughly rinsed to remove the metallic canning liquid (aquafaba). This is the foundation of our plant-based recipes collection.
1 Tablespoon (15ml) Extra Virgin Olive Oil: The fat acts as the heat conductor, ensuring the heat from the air fryer hits the skin evenly to create those iconic blisters.
1 Teaspoon (5g) Smoked Paprika: This provides the “vibrant red” dusting mentioned in our visual guide and adds a deep, wood-fired aroma.
½ Teaspoon (2.5g) Fine Garlic Powder: We use fine granules rather than fresh garlic to prevent burning in the high-heat environment of the air fryer.
½ Teaspoon (3g) Coarse Sea Salt: These translucent crystals provide a burst of salinity and a sophisticated finishing touch.
For the Dip: 2 Tablespoons (30ml) Creamy Tahini: A blurred ceramic ramekin of creamy white tahini sauce provides the perfect nutty, cooling contrast to the spicy, crunchy chickpeas.
How to Make the Crispiest Air Fryer Chickpeas
Phase 1: The Critical Drying Process
The secret to air fryer chickpeas that actually stay crunchy lies in the moisture content. After rinsing your chickpeas, you must pat them dry with a clean lint-free towel or paper towels. Do not skip this step. Any residual water will create steam, resulting in a soft, mushy bean rather than a blistered one. For the best results, let them air dry on the counter for 10 minutes after patting them down.
Phase 2: The First Roast (The Blister Phase)
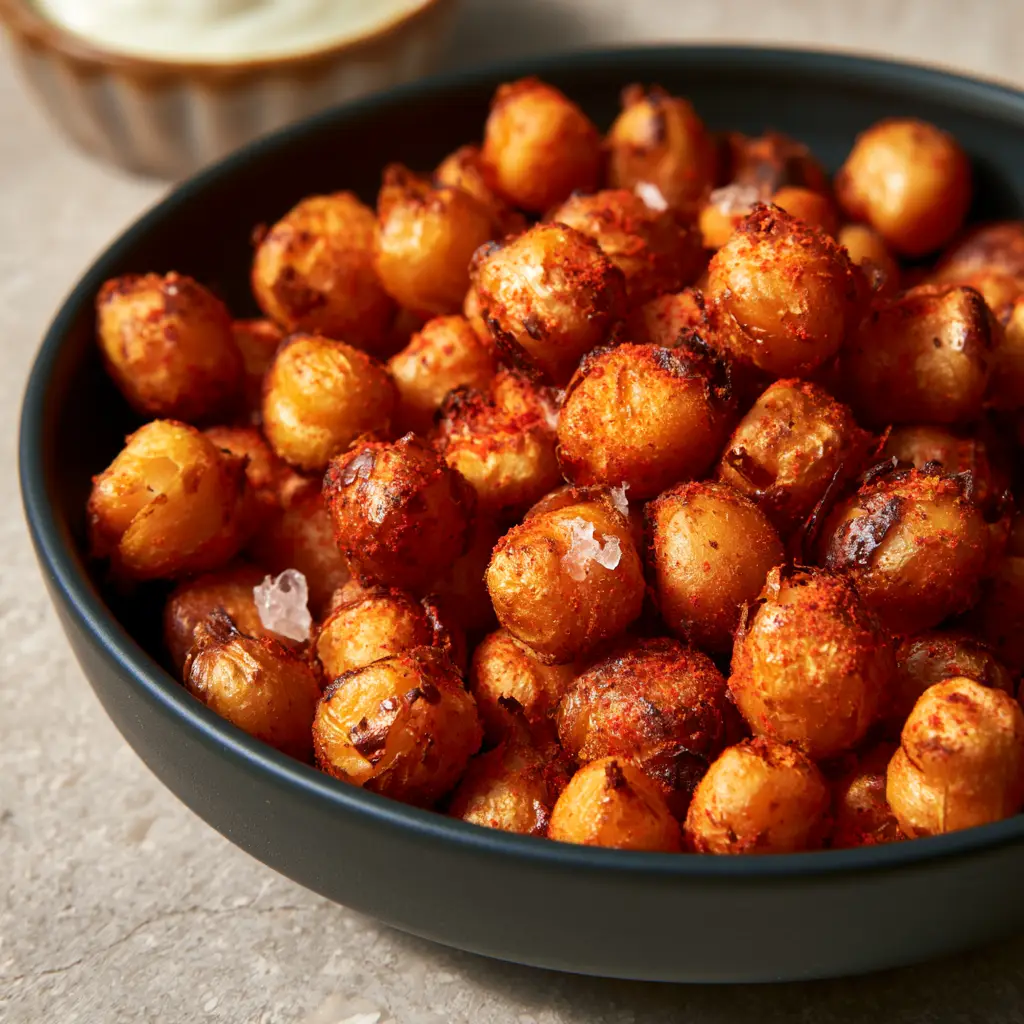
Preheat your air fryer to 400°F (200°C). Place the dry chickpeas in a bowl and toss with only the olive oil. Do not add the spices yet! Adding spices at the beginning can cause the paprika to burn and turn bitter. Slide the basket in and cook for 12-15 minutes. You should hear them “popping” slightly—this is the sound of the skins shattering and blistering into that rugged, crunchy topography.
Phase 3: The Flavor Infusion
Open the basket and check for a deeply roasted golden-orange hue. Once they look visually crisp, pour them back into a bowl and immediately toss with the smoked paprika, garlic powder, and sea salt. The residual heat and oil will cause the fine garlic powder and vibrant paprika to adhere to the rugged surface of the beans.
Phase 4: The Final Crisp
Return the seasoned chickpeas to the air fryer for a final 2 minutes. This “sets” the spices and ensures every bean is bone-dry and ultra-crispy. Serve immediately in a matte black ceramic bowl with a side of creamy tahini for the ultimate high-end smartphone food photography aesthetic.
Expert Tips for Success
- Don’t Overcrowd: To get that even, shattered texture, ensure the chickpeas are in a single layer. If you are making a double batch, cook them in two separate rounds.
- The Skin Removal Myth: You do not need to peel every chickpea. In fact, the skins are what create the “shattered” visual appeal we love in these air fryer chickpeas.
- Season Twice: For maximum flavor, add a tiny extra pinch of sea salt right before serving to catch the light and add visual texture.
- Pairing Suggestions: These make an incredible crunchy topper for a crunchy asian edamame salad or even a creamy dairy-free macaroni salad.
Storage, Reheating & Freezing
To Store: While these are best enjoyed immediately, you can store leftovers in a glass jar. Do not seal the lid tightly while they are still warm, or the condensation will ruin the crunch. Store at room temperature for up to 3 days.
To Reheat: If your air fryer chickpeas lose their snap, simply pop them back into the air fryer at 350°F (175°C) for 3-4 minutes. They will crisp right back up!
Freezing: We do not recommend freezing roasted chickpeas as they lose their signature shattered texture upon thawing.
What to Serve With This
These savory chickpeas are incredibly versatile. They add a much-needed crunch to softer dishes like air fryer crispy tofu bites or even a side of air fry asparagus. If you are hosting a summer BBQ, sprinkle them over an italian macaroni salad for a surprising texture contrast that guests will love.
Frequently Asked Questions
Yes, but you must soak and cook them until tender first. Once cooked and cooled, follow the same drying and air frying instructions.
They are best within the first few hours, but if stored in a loosely covered glass jar at room temperature, they can stay crunchy for up to 3 days.
No! The skins are essential for that ‘shattered’ texture and blistered appearance. Peeling them is time-consuming and unnecessary for a crunchy result.
400°F (200°C) is the sweet spot. It provides enough heat to blister the skins quickly without burning the interior of the bean.
The most common reason is moisture. If the chickpeas aren’t completely dry before oiling, they will steam rather than crisp. Ensure you pat them dry and let them air dry for 10 minutes.
The Ultimate Air Fryer Chickpea Recipe

Air Fryer Chickpeas: The Secret to Ultra-Crispy Blistered Skins
Ingredients
Equipment
Method
- Rinse the chickpeas and pat them extremely dry using a lint-free towel. Let them air dry for an additional 10 minutes to ensure the skins blister.
- Toss the dried chickpeas with olive oil in a medium bowl until evenly coated.
- Place chickpeas in the air fryer basket at 400°F (200°C) for 12-15 minutes, shaking halfway through until golden-orange.
- Remove chickpeas, toss with smoked paprika, garlic powder, and sea salt while hot.
- Return to the air fryer for 2 more minutes to set the spices and achieve a shattered texture.
Notes
Always add spices after the initial roast to prevent the paprika from burning.
Save This Recipe to Pinterest!
Did you love the “shattered” crunch of these air fryer chickpeas? Make sure to save this recipe to your Healthy Snacks board on Pinterest! Follow diane_kitchen_1 for more ultra-crispy one-pan meals and air fryer hacks. If you made these, snap a photo of your matte black bowl and share it in the comments below—I love seeing your crispy results! Don’t forget to leave a 5-star rating to help other home cooks find this recipe.