Vegetarian casseroles are the ultimate comfort food for busy weeknights, offering a hearty, protein-packed meal that the whole family will love. This specific recipe transforms humble pantry staples into a gourmet experience, featuring creamy cannellini beans and vibrant wilted baby spinach bathed in a luxurious roasted garlic cream sauce. Whether you are looking for healthy family dinner recipes or a show-stopping dish for your next gathering, this bake delivers on flavor, texture, and visual appeal.
When you think of vegetarian casseroles, you might imagine heavy, dated recipes from decades ago. This modern version focuses on fresh aromatics like caramelized red onions and the bright tang of sun-dried tomato slivers. The result is a sophisticated flavor profile that satisfies even the most dedicated meat-eaters. It is the perfect addition to your rotation of plant-based recipes.
Why This Is The Best Vegetarian Casserole You Will Ever Make
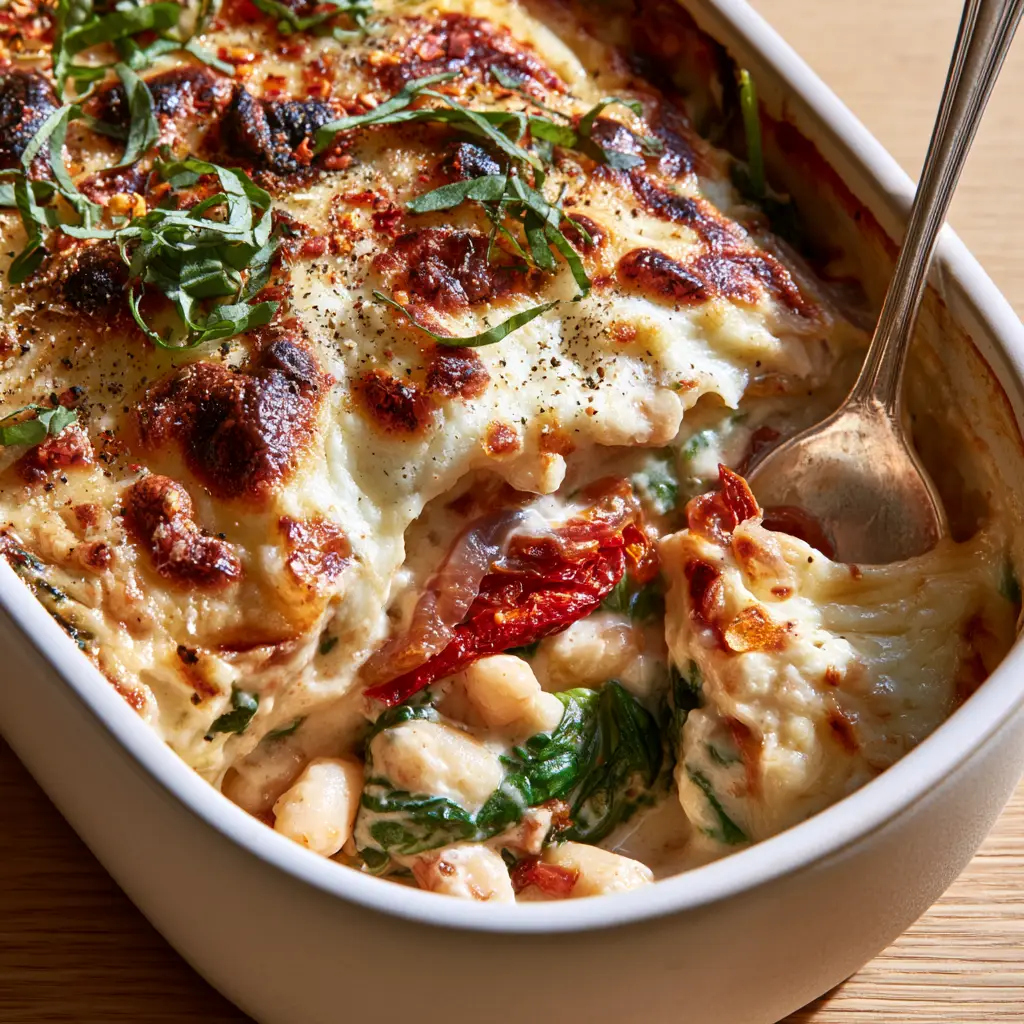
- Textural Perfection: Experience the contrast between the plump, creamy white cannellini beans and the heavily blistered, golden-brown toasted mozzarella crust.
- Depth of Flavor: The thick roasted garlic cream sauce provides a velvety base that carries the sweetness of caramelized red onions.
- Visual Masterpiece: Garnished with fresh emerald green basil ribbons and a dusting of crushed red pepper flakes, it looks as good as it tastes.
- High Protein & Filling: Utilizing beans makes this a satisfying alternative to traditional meat-heavy dishes, perfect for those exploring high-protein snacks or meals.
If you enjoy this style of hearty, vegetable-forward cooking, you should also check out our sun-dried tomato chickpea pasta for another quick and flavorful weeknight win.
The Essential Ingredients for Gourmet Vegetarian Casseroles
Cannellini Beans: 3 cans (15 oz / 425g each), rinsed and drained. These provide the “meatiness” and a creamy interior that absorbs the sauce perfectly.
Baby Spinach: 5 cups (150g), fresh. We wilt this directly into the sauce to ensure every bite is packed with nutrients and color.
Roasted Garlic: 2 whole heads. Roasting the garlic mellows the sharp bite into a sweet, buttery paste that defines the thick roasted garlic cream sauce.
Heavy Cream: 2 cups (480ml). This creates the decadent, velvety foundation of the dish.
Red Onions: 2 large, thinly sliced. We slow-cook these until they become translucent caramelized red onions to add a natural sweetness.
Sun-Dried Tomatoes: 1/2 cup (60g), julienned. These “flavor bombs” add a necessary acidic brightness to cut through the rich cream.
Cheese Blend: 2 cups (225g) shredded mozzarella and 1/2 cup (50g) grated parmesan. This creates that iconic thick, uneven blanket of toasted cheese.
Seasonings: Fresh basil, crushed red pepper flakes, and coarse cracked black pepper for the final aromatic finish.
How to Master This Creamy Bean Casserole
Phase 1: Roasting the Garlic and Caramelizing Onions
Start by preheating your oven to 400°F (200°C). Slice the tops off your garlic heads, drizzle with olive oil, wrap in foil, and roast for 40 minutes. The cloves should be soft and golden.
While the garlic roasts, heat 2 tablespoons (30ml) of olive oil in a large skillet over medium-low heat. Add your sliced red onions and a pinch of salt. Sauté slowly for 20-25 minutes. You are looking for translucent caramelized red onions that are jammy and sweet.
Phase 2: Crafting the Roasted Garlic Cream Sauce
Once the garlic is cool enough to handle, squeeze the roasted cloves into a small bowl and mash into a paste. In a medium saucepan, whisk together the heavy cream and the garlic paste over medium heat.
Simmer the sauce for 5-8 minutes until it reduces slightly and becomes a thick roasted garlic cream sauce. Season generously with sea salt and cracked black pepper. The aroma at this stage is incredible and is a hallmark of high-end vegetarian casseroles.
Phase 3: Assembly and The Blistered Cheese Crust
In a large mixing bowl, combine the creamy cannellini beans, the wilted baby spinach (you can wilt it in the warm sauce first), the caramelized onions, and the sun-dried tomato slivers.
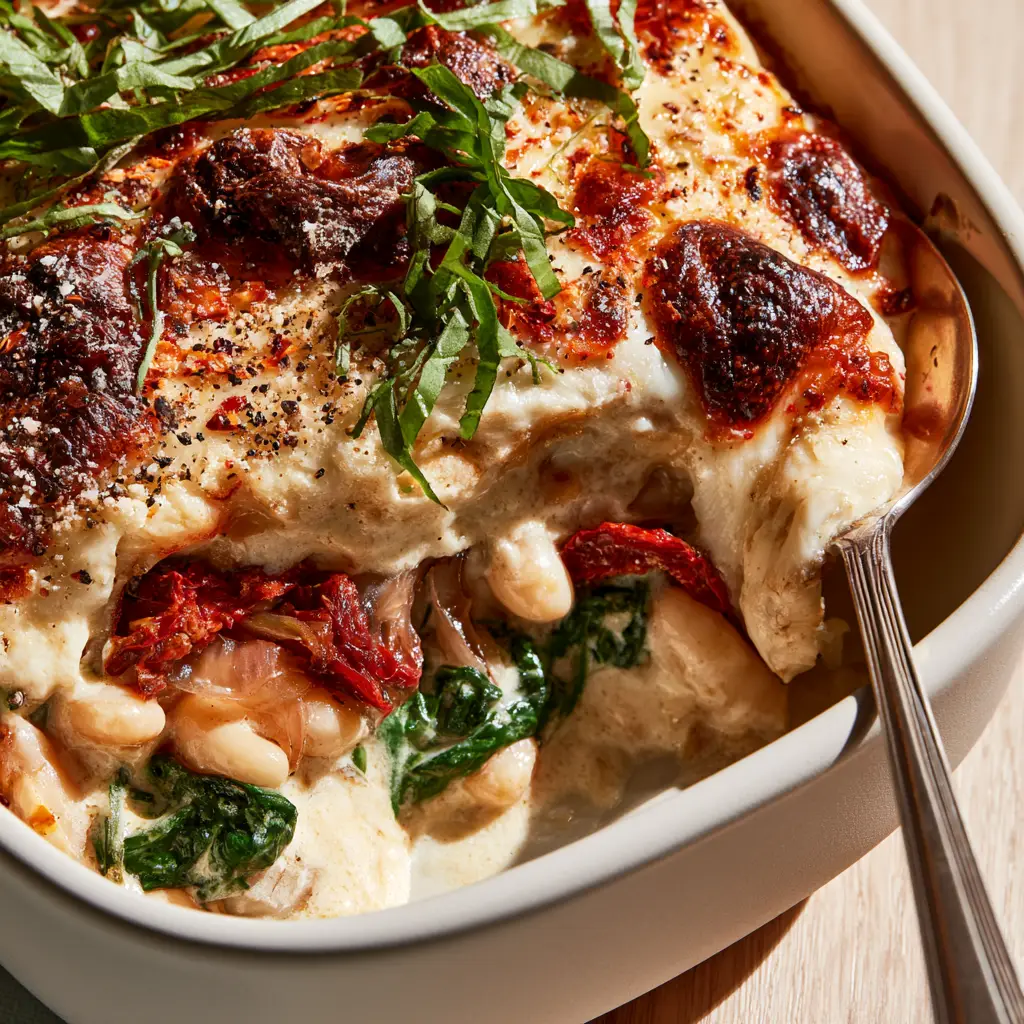
Pour the mixture into a modern matte-white ceramic baking dish. Pour the cream sauce over the top, ensuring it seeps into all the crevices. Top with an uneven blanket of mozzarella and parmesan.
Bake at 375°F (190°C) for 25-30 minutes. For the final touch, turn on the broiler for 2-3 minutes until you see those charred bubbly edges and heavily blistered, golden-brown toasted mozzarella.
Expert Tips for Success
- Dry the Spinach: If using frozen spinach, squeeze out every drop of water to prevent the sauce from becoming watery.
- Don’t Skimp on the Broiler: The toasted parmesan crust is essential for the “Pinterest-style” visual appeal and adds a salty crunch.
- Fresh Herbs Matter: Always add the fresh basil ribbons *after* baking to preserve their emerald green color and bright flavor.
- Rest the Dish: Let the casserole sit for 10 minutes after baking. This allows the thick roasted garlic cream sauce to set, making it easier to serve.
For more convenient cooking ideas, take a look at our collection of one-pan meals that save time without sacrificing flavor.
Storage, Reheating & Freezing
Store any leftover vegetarian casseroles in an airtight container in the refrigerator for up to 4 days. The flavors actually deepen overnight!
To reheat, place a portion in the oven at 350°F (175°C) covered with foil until warmed through. This preserves the gooey cheese stretch better than a microwave.
While you can freeze this dish, the cream sauce may slightly separate upon thawing. If you do freeze it, consume within 2 months and reheat slowly while stirring if possible.
What to Serve With This Casserole
This dish is incredibly rich, so it pairs beautifully with something crisp and acidic. A simple arugula salad with a lemon vinaigrette works wonders. Alternatively, serve it alongside our crunchy Asian edamame salad for a fusion of fresh textures.
If you’re hosting a brunch, this casserole also complements oven-baked French toast for a sweet and savory spread that will impress any guest.
Frequently Asked Questions
Absolutely. You can assemble the dish up to 24 hours in advance and store it in the fridge. Simply add 5-10 minutes to the baking time when cooking from cold.
Yes, while cannellini beans are preferred for their creaminess, great northern beans or chickpeas also work well in this heavy cream-based sauce.
Ensure your spinach is fresh or thoroughly squeezed if frozen, and allow the roasted garlic cream sauce to reduce until it thickly coats the back of a spoon before mixing.
This recipe is naturally gluten-free as written, provided your heavy cream and seasonings are certified gluten-free. There is no flour used in the roasted garlic cream sauce.
Use the broiler for the final 2-3 minutes of cooking. Watch it closely, as the parmesan and mozzarella can go from golden to burnt very quickly!
The Ultimate Creamy Roasted Garlic Bean Casserole Recipe
Vegetarian Casseroles: Creamy Roasted Garlic and Cannellini Bean Bake
Ingredients
Equipment
Method
- Preheat oven to 400°F (200°C). Roast garlic heads drizzled with oil in foil for 40 minutes until soft.
- Sauté sliced red onions in olive oil over medium-low heat for 20-25 minutes until translucent and jammy.
- Whisk heavy cream and roasted garlic paste in a saucepan over medium heat for 5-8 minutes until thickened.
- Fold beans, spinach, caramelized onions, and sun-dried tomatoes into the garlic cream sauce.
- Transfer to a baking dish, top with mozzarella and parmesan. Bake at 375°F (190°C) for 25 minutes.
- Broil for 2-3 minutes until the cheese is blistered and golden brown. Garnish with basil, red pepper flakes, and black pepper.
Notes
Allow the casserole to rest for 10 minutes before serving to let the cream sauce set.

Share Your Casserole Creations!
We want to see your vegetarian casseroles! Did you get that perfect blistered mozzarella crust? Follow diane_kitchen_1 on Pinterest for more daily inspiration and save this recipe to your “Healthy Dinners” board.
If you made this, please leave a 5-star rating in the recipe card above and upload a photo of your dish in the comments below. Your feedback helps our community of home cooks thrive!